
Visual Inspection of the Overflow Tank
Identifying Cracks and Warping
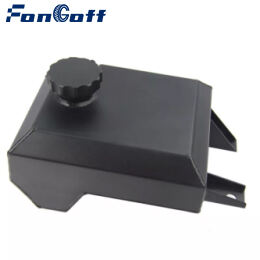
Checking the overflow tank for cracks and signs of warping matters a lot when it comes to keeping the cooling system working right. Most cracks happen because of those constant temperature changes or maybe something bumped into the tank while driving down the road. These cracks weaken the whole structure and eventually lead to coolant leaks. When looking around the tank, grab a flashlight if possible since some small cracks just won't show up under normal light conditions. For spotting warping issues, take actual measurements against what the factory specs say they should be. If there's even a slight difference between what's measured and what was supposed to be there, that means the tank isn't holding shape anymore which affects how well everything runs in the engine bay.
Spotting Coolant Residue or Discoloration
Keeping an eye out for coolant residue near the overflow tank matters because it might mean there are leaks happening somewhere. If these leaks aren't fixed quickly enough, they can cause serious problems like engine overheating down the road. When looking at the tank itself, watch out for changes in color too. Yellow spots or greenish patches often point to either overheated coolant or some kind of chemical reaction going on inside. Want to test for leaks? Grab a damp cloth and run it over the tank surface. Any strange colors transferring onto the fabric probably means coolant is escaping somewhere. Staying alert about these things makes all the difference in keeping the car running smoothly without risking major damage to the engine components later on.
Assessing Tank Alignment and Stability
Getting the overflow tank aligned right and fastened securely matters a lot if we want to stop those annoying vibrations that just eat away at components over time. When things aren't lined up properly, coolant tends to leak out or simply not work how it should, which means trouble with overheating down the road. Grabbing a level tool makes sense here to keep everything flat and steady on installation day. Also worth checking? See if the tank jumps around too much while driving. That kind of bouncing isn't normal and will likely cause problems sooner rather than later. Fixing these small details before they become big headaches helps maintain good engine performance and keeps vehicles running longer between repairs.
Using a Pressure Tester to Identify Leaks
Preparing the Cooling System for Testing
Getting ready properly before grabbing that pressure tester makes all the difference in preventing mishaps. Let the engine sit until it cools off entirely first because nobody wants to get burned messing around with hot radiators and coolant systems. Make sure every valve is shut tight and the radiator cap sits snug on its perch since these small details really matter for getting good pressure numbers. Don't forget to give the whole cooling system a once over too looking for any obvious problems like cracks in components or hoses that might be coming loose somewhere. Taking time to check everything out ahead of time pays off big time later when running tests actually reveals where leaks might hide instead of giving false readings.

Simulating System Pressure for Leak Detection
If we want to check for leaks properly, first attach the pressure tester to either the radiator or the overflow tank. The pressure needs to be pumped up to what the manufacturer recommends, typically around 15-20 psi range, so everything stays safe during testing. Keep an eye on that pressure gauge at all times. When the pressure starts dropping, that means there's probably a leak somewhere in the system. While doing this test, it helps to listen closely too. Any hissing noises might mean air or coolant is escaping from the system. These sounds actually point us right to where the problem lies most of the time, making it much easier to find and fix whatever is causing the leak.
Checking Hose Connections and Seals
Inspecting Clamps for Looseness or Rust
Keeping those hose connections intact really matters if we want to stop leaks from happening in our cooling systems. When I get started on this stuff, my first move is usually looking at all those clamps attached to the hoses going into and out of the overflow tank. Rust spots or corrosion marks? That's what I'm watching for. Found a loose clamp somewhere? Time to grab either a screwdriver or wrench and give it a good tighten down. But watch out for those clamps that look seriously rusted through or just plain damaged. Those need replacing right away so everything stays sealed properly. Don't forget about regular checkups too. Just making sure those clamps stay in decent shape goes a long way toward avoiding nasty surprises later when a failed clamp causes a leak nobody saw coming.
Evaluating Hose Brittleness and Flexibility
Checking those cooling system hoses regularly makes all the difference when it comes to spotting problems before they become big headaches. When I look at them, I'm on the lookout for things like getting brittle, cracks forming, or just general wear and tear that means replacement time is coming soon. What I actually do is run my hands along each hose, give it a gentle squeeze and twist here and there to see how flexible it still is. If a hose feels stiff instead of pliable, that's usually a red flag pointing toward deterioration down the road. Keeping up with these checks and swapping out old hoses when needed really extends how long the whole cooling system lasts. Nobody wants to deal with a sudden breakdown caused by a failed hose, so this kind of maintenance pays off in spades over time.
Monitoring Coolant Levels for Sudden Drops
Establishing a Baseline Coolant Level
To effectively monitor coolant levels, it's crucial to first establish a baseline when the engine is cool. Here's how:
- Check the Coolant Level When Cool: Refer to the vehicleâs ownerâs manual to compare the coolant level against the recommended levels. Doing so ensures you're using the correct parameters for your specific vehicle model.
- Use Appropriate Tools: Utilize tools such as a dipstick or sight glass, if available, to obtain an accurate measurement. This offers clarity on whether the current level falls within the normal range.
- Document Baseline Levels: Keep a record of these initial readings for future reference. This will assist in tracking changes over time and enable better monitoring of the coolant levels.
Establishing this baseline acts as a point of comparison for identifying any irregularities quickly and efficiently.
Interpreting Gradual vs. Abrupt Changes
Understanding the distinction between gradual and sudden changes in coolant levels is important for diagnosing potential issues:
- Monitor Gradual Decreases: These may signal a slow leak within the system. Regular checks can help prevent minor issues from escalating into severe problems by detecting leaks early.
- Identify Sudden Drops: A sudden decrease in coolant levels often points towards a major leak or system failure. Awareness of this behavior is critical as it requires immediate attention and intervention.
- Routine Checks After Long Drives: After long journeys or extended engine operations, monitor the coolant level to ensure it hasn't dropped unexpectedly. Prompt identification of any shifts in coolant levels can help avoid extensive engine damage.
By distinguishing between gradual and abrupt level changes, you can take timely action to maintain engine health and prevent significant failures.
Post-Running Checks for Damp Spots or Puddles
Identifying Leak Locations Under the Vehicle
When checking a vehicle after it has run, look for any wet patches or puddles on the ground beneath it since these often point to coolant leaks somewhere in the system. A good flashlight comes in handy when inspecting dark corners where light doesn't reach well, particularly near the overflow reservoir area that tends to develop leaks quite frequently. Mechanics appreciate getting precise information about where exactly fluid is escaping because it saves them time hunting all over the place during repairs. Finding those leaks early before they get worse actually stops bigger problems from happening down the road with the engine itself.
Differentiating Coolant from Other Fluids
When trying to figure out where a leak is coming from, knowing the difference between coolant and other car fluids like oil matters a lot. Coolant typically stands out because it comes in bright colors - think green, orange, maybe even yellow sometimes - and gives off that unmistakable sweet scent most people recognize. Oil tells a different story altogether though. It tends to look much darker, almost black sometimes, and feels thicker when touched. Getting familiar with how these fluids look and feel helps mechanics track down exactly where problems are happening. Once they know what kind of fluid is escaping, technicians can address whatever issue needs fixing properly, keeping cars running smoothly instead of guessing around until something breaks completely.
FAQ
Why is it important to inspect the overflow tank in a vehicle?
Routine inspection of the overflow tank is critical to avoid potential leaks that may lead to engine overheating or failure, ensuring efficiency and longevity of the vehicle's cooling system.
How can cracks and warping of the overflow tank affect my vehicle?
Cracks and warping can compromise the structural integrity of the overflow tank, leading to leaks and inefficient cooling performance, ultimately risking engine damage.
How can I detect coolant residue around the overflow tank?
You can spot coolant residue by visually inspecting areas around the overflow tank and wiping the surfaces with a damp cloth to observe any unusual discoloration.
What tools can I use to ensure overflow tank stability and alignment?
A level tool can help ascertain that the overflow tank is horizontally stable and securely fastened to prevent excessive vibrations during vehicle operation.
Why are pressure testers used in identifying leaks?
Pressure testers simulate system pressure allowing you to identify leaks by observing pressure drops and listening for any hissing sounds indicating air or coolant escape.
How do I differentiate coolant from other fluids leaked under my vehicle?
Coolant is typically bright green, orange, or yellow with a sweet smell, while oil tends to be darker and more viscous, helping to distinguish between the two.
Table of Contents
- Visual Inspection of the Overflow Tank
- Using a Pressure Tester to Identify Leaks
- Checking Hose Connections and Seals
- Monitoring Coolant Levels for Sudden Drops
- Post-Running Checks for Damp Spots or Puddles
-
FAQ
- Why is it important to inspect the overflow tank in a vehicle?
- How can cracks and warping of the overflow tank affect my vehicle?
- How can I detect coolant residue around the overflow tank?
- What tools can I use to ensure overflow tank stability and alignment?
- Why are pressure testers used in identifying leaks?
- How do I differentiate coolant from other fluids leaked under my vehicle?